SOLO Control
Compile the .ino and .c files via the Teensyduino IDE following
these instructions and flash the result to the microcontroller.
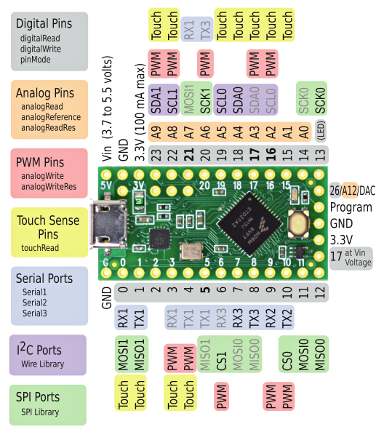
Then connect the linear potentiometer. VCC of the potentiometer goes to 3.3V, GND to GND. The voltage divider pin of the
poti must be connected to pinout A9 of the Teensy-LC. If needed, it is possible to switch to any other of the analog
inputs by adjusting A_IN in the .ino file accordingly.
After flashing, the device will show up as SOLO Control in the list of MIDI devices. It will output control change
messages on channel 1 and controller 20 (which is not assigned to anything by default according to the
MIDI specification).
In contrast to many traditional MIDI devices, SOLO Control will emit the current value of the control repeatedly. This allows connected programs to initialize properly, even if the control doesn’t actually change.